Default Menu Items Adjustments
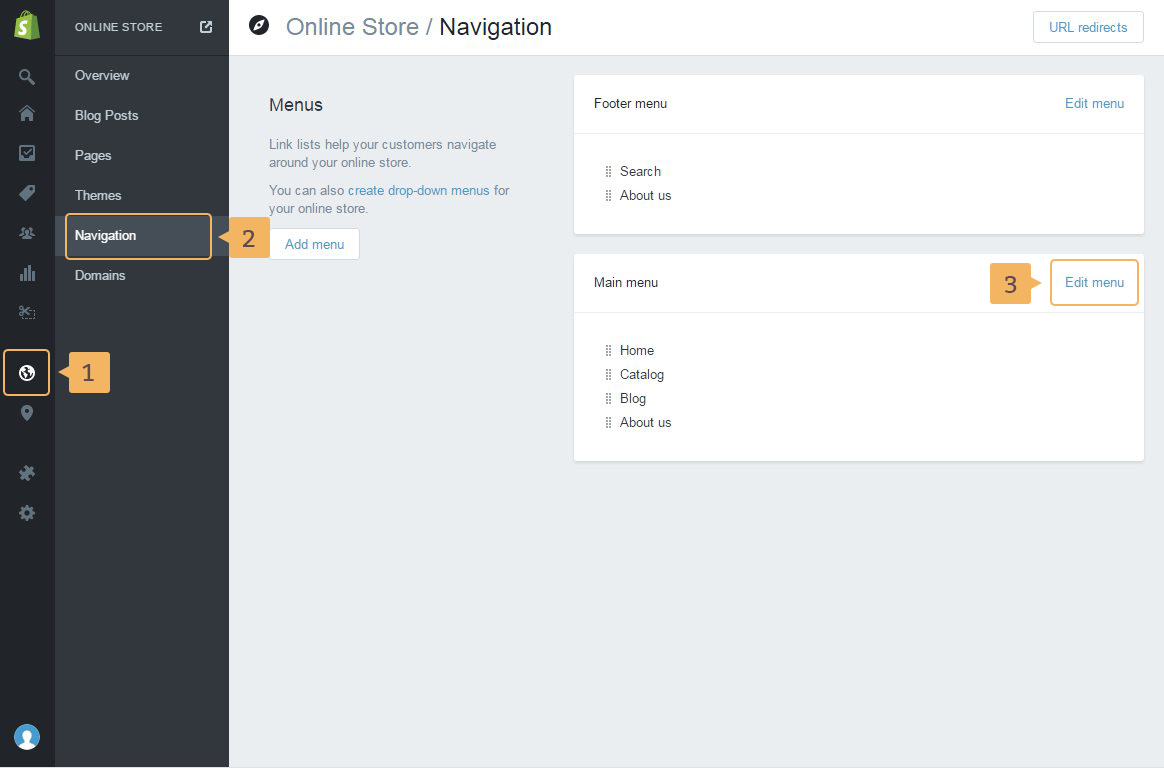
After creating a new store, the default navigation menu should look like the sample in Figure 2.1. To change default menu items, please, go through the following steps:
- Log in into your Shopify admin panel
- Open page with Navigation: click 'Online Store' (Fig. 2.1 - [ 1 ]) > 'Navigation' (Fig. 2.1 - [ 2 ])
- Click 'Edit menu' (Fig. 2.1 - [ 3 ])
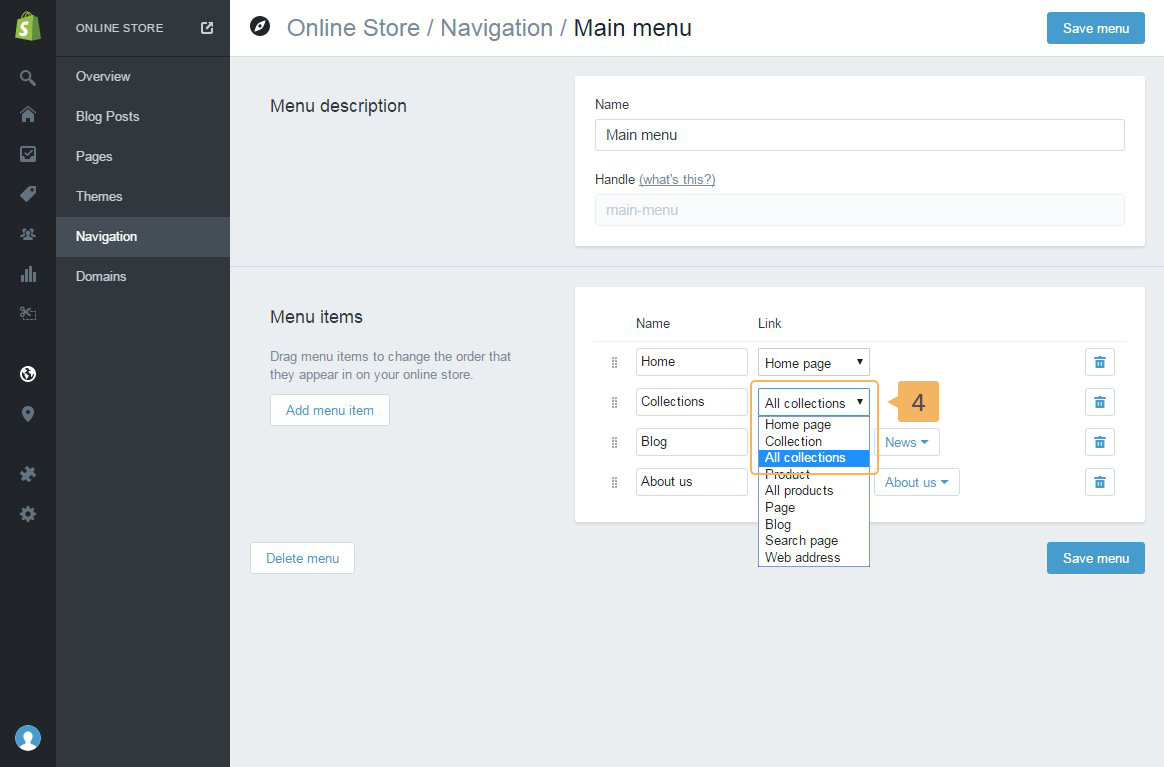
- To change menu item link, choose an option from the dropdown list. For example, changing the link for menu item 'Collections' is showing in Figure 2.2 - [ 4 ].
- For menu item 'Blog', you need to choose the blog from the third dropdown list (Fig. 2.3 - [ 5 ]).
- To create 'Contact' menu item: click 'Add the menu item' (Fig. 2.4 - [ 6 ]). Enter name of menu item (Fig. 2.4 - [ 7 ]). In 'link' dropdown click 'Page' (Fig. 2.4 - [ 8 ]). And choose the page that will be used as the contact page. After those steps, you should get a menu as in Figure 2.5.
Notice! Menu item 'Login' will be shown automatically if accounts are enabled in admin panel. If this is your case you may follow instructions to know how to enable customer accounts from this Shopify post.