Footer Navigation
Footer navigation makes it easy for users to navigate their way around. Shopify has created default footer menu when you made a store (Fig. 2.18 - [ 1 ]). You can change default items and add a new item to this footer menu. How to change and add menu items in the footer is described later in this documentation.
In Foodly theme, you could use the additional footer menu. If you want to use additional footer menu, please, go through the following steps:
- Open 'Navigation page' in your admin panel (Fig. 2.19 - [ 2 ] - [ 3 ])
- Click 'Add menu' (Fig. 2.19 - [ 4 ])
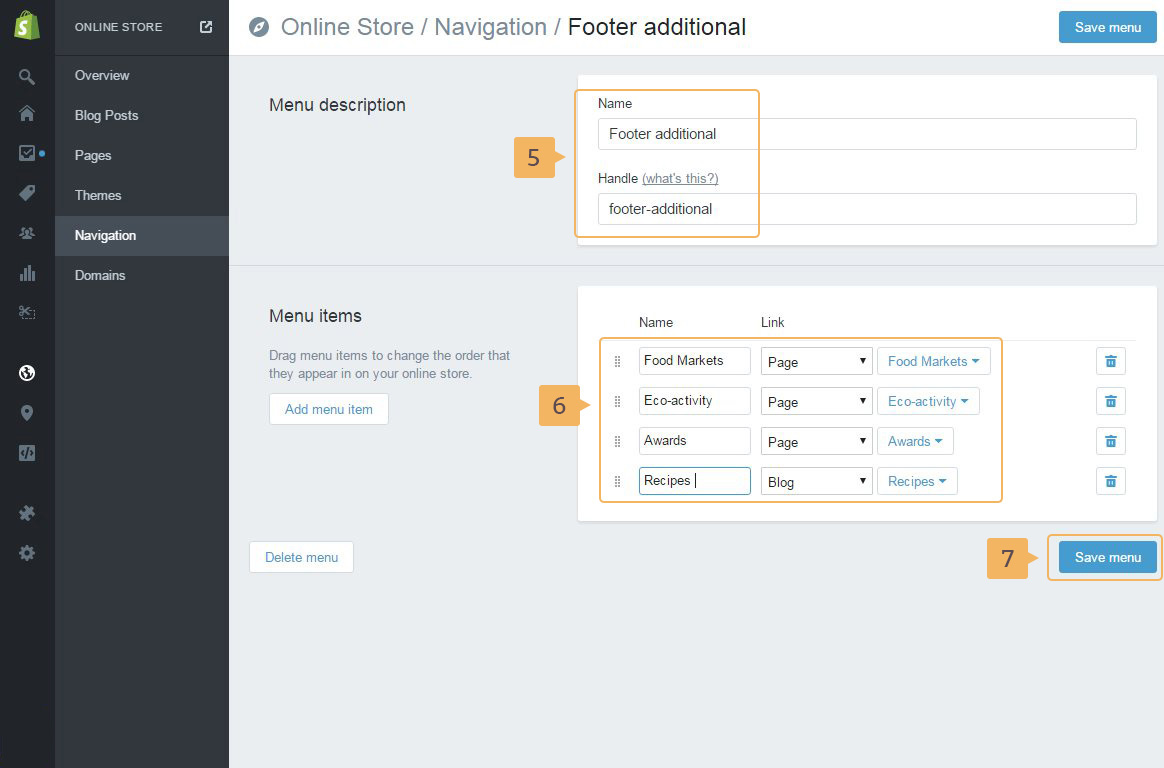
- In the next window give a name for the additional footer menu (Fig. 2.20 - [ 5 ])
- Add new menu items (Fig. 2.20 - [ 6 ])
- Save menu (Fig. 2.20 - [ 7 ])
- To show additional footer menu in your store, you need to enable it in 'Theme customization settings'. Go to 'Online store' > 'Themes' > 'Customize theme' button (Fig. 2.10)
- Choose 'Footer' (Fig. 2.21 - [ 8 ]).
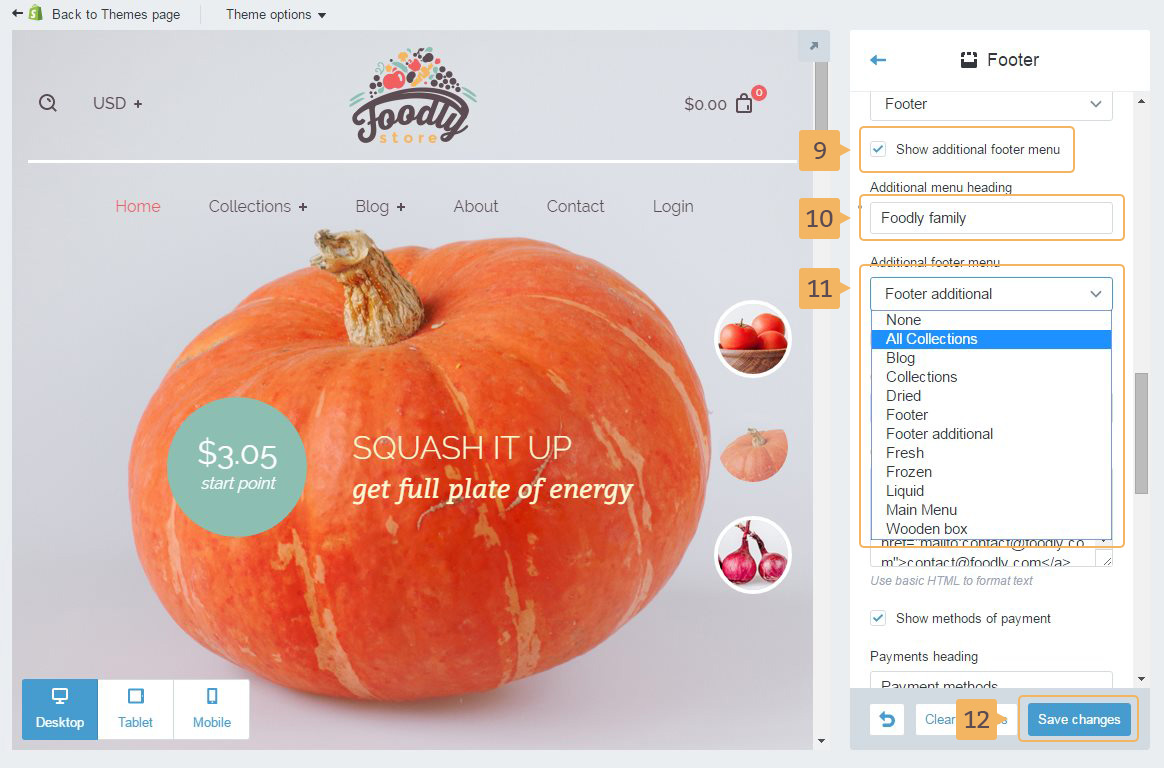
- And then find 'Show additional footer menu' checkbox - click it (Fig. 2.22 - [ 9 ])
- You can change the heading for the menu (Fig. 2.22 - [ 10 ])
- In the dropdown choose the additional footer menu which was created in the point 3 (Fig. 2.22 - [ 11 ]).
- Save modified settings (Fig. 2.22 - [ 12 ])
You may check the default footer menu in Figure 2.23.